Thursday, April 21, 2011

Another type of firing....

Remember in last week's blog I mentioned how some pots had not turned completely black and had variations in color? There is actually a type of firing where this is done intentionally. The Mata Ortiz potters are famous for polychrome pottery, where colored slips are painted over the burnished surface. Slip is a clay and water mixture and can have a colorant added to it also. To fire the polychrome pots, the potter uses a similar technique from what my student teacher used but leaves a hole in the tub covering the pots to allow oxygen to circulate around the pot during the firing. The pot does not turn black and the colored slips show. The Mata Ortiz potters use incredible detail in their pottery.
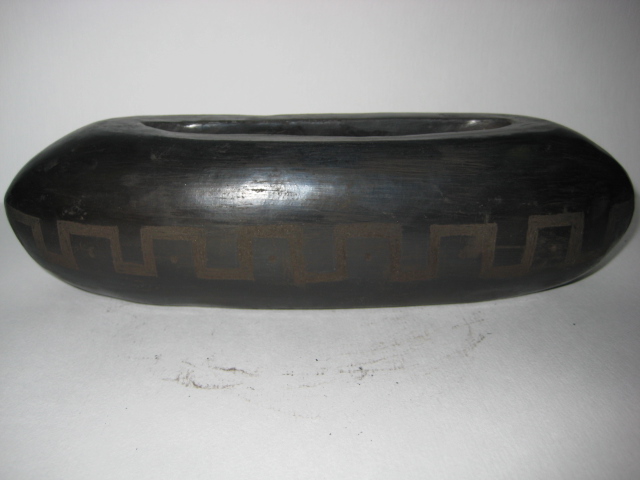
This is an example of the Mata Ortiz pottery.
http://www.finepueblopottery.com/MataOrtiz5.htm

These methods of firing are very risky compared to traditional methods of firing in a kiln because many pots do not survive the intense heat rise. Because of this, these pots are highly sought after by collectors.

Another type of firing is a saggar firing where a pot has materials such as pine straw, corn husks, copper wire, sugar, or salt placed on it and then it is wrapped in aluminum foil. It is then fired in the same process as the burnished pots. Many variations come out in the clay depending on what the item was that was added.
As you can see, the variations are spectacular and depend on the type of material used. I can see how it is easy to get "hooked" on this type of firing which is what my student teacher has done. This summer, I hope to try many firings of this type.

Tuesday, April 12, 2011

Showcase

Here is an example of the multi-color range when there was more oxygen under the tub. I love this piece but naturally, the student preferred it to have been all black. The element of surprise is what makes the pit firing so unique.


Detail view

The students seemed very satisfied with their pieces. A few pieces actually looked much nicer after they turned black.

The students had to rinse and dry off the pots. They have a ash, fireplace smell which will not linger for very long.


Tuesday, April 5, 2011

The Big Day!


Steve, my student teacher, was cutting pieces of wood when I arrived. I helped him cut up two wooden palettes with his table saw. Nails are placed in clusters of three in an area the size of the tub we are using. The pots will be set on top of the nails to lift them up off of the ground.


Sawdust is added next. This is what will combust and make the pots black. Steve said he has used shredded paper but the sawdust works the best. It is a little slower burning which is better.


Steve has experimented and fired many pit firings. He has found that the pots are less likely to crack or explode if they are heated before the pit firing. This makes sense as the kilns at school are taken up very slowly. Remember these pots have been fired at school to cone 018 to remove all moisture. So into the kitchen oven they went in many batches, heating up to 500 degrees. We carried them out to the pit fire area, placed them on the nails along with a few just laying on the saw dust.


The tub was put on them to cover and retain the heat.


Wood was placed slightly overlapping around the tub.


A wire band is placed around the wood/tub to hold the wood in place and pine cones are placed on the top of the tub to burn. Lighter fluid is used to start the fire.


And there it went, up in flames. Yes, Steve had a burn permit and a fire extinguisher close by. I asked to make sure.


The fire burns the wood and burns itself out. This took about an hour and a half. Steve said the time varies depending on what type of wood he is using.


The tubs cannot be taken off until the tub is almost cool to the touch. The excitement was killing me. Finally, we took them off and voila, beautiful black pots. And we didn't lose any which was great. The students spent two weeks burnishing the pots which is a long time to have a pot crack or blow up on you.

We had four tubs going almost simultaneously. After I left, when Steve uncovered two tubs, they did not have a complete black look. He said they were an orange and black combination which was beautiful but since the students are expecting black pots, he fired them again. The tubs were not sitting flat on the ground so a little more oxygen came into these tubs which resulted in them not being totally black.


The students will wipe their pots down and have a beautiful pot. For those students who burnished properly, the contrast between the dull areas of either a slip application or the sgraffito/scratched technique, will be quite beautiful. When I return to school next week after Spring Break, I will take close ups of many of the pots to post.

Here is the result of one of the tubs:


Friday, April 1, 2011

Upcoming Pit firing


We are on Spring Break for this next week and since we have had rain most of this week, we have not been able to fire the burnished pots. It looks like the weather will allow us to fire them this next week so we are aiming for Monday. I am assisting my student teacher at his house since this technique is new to me also.


Pit firing is a great way to finish off burnished pots. The pots will have the black and grey smoke marks from being in contact with the smoke and combustible materials. Other colors such as a warm red, yellow, and pink colors can be obtained also by adding chemicals into the pit firing.

There are many ways to do a pit-firing. The pots are all affected by many variables such as type of pit firing, clay used, fuel used, chemicals added, and the altitude where they are fired.

A pit can be of any size from small enough for one person to fill or large enough for hundreds of pots. We will be using a galvanized tub purchased at Home Depot for approximately $20.

The firing usually takes 3-4 hours.
This information is taken from the book Low-firing and Burnishing by Sumi von Dassow.

I will shoot photos of the process to upload in more detail. Here are a few general ones for a "sneak a peek".

Photos by Steve Revill